Nope, not a double yoke which is exciting enough with my son but a double egg.
He ran down to the barn to inform me that the honking big egg I brought home from work the other day had another egg inside it. I've heard of the myth but never saw one before.
Showing posts with label cooking. Show all posts
Sunday, July 3, 2016
Sunday, January 26, 2014
Sticky Buns
I came across this blog entry at 1840 Farm and just had to order the book since I got two new cast iron pans for Christmas.
Since I've been in a cast for several weeks now due to a slip on a sheet of ice while carrying buckets of water to the barn, I've been out of commission. Farm Girl volunteered. Like the blog author of 1840 Farm, she chose to start with these sticky buns. Minus the pecans.
They were fantastic and tasted so good nice and warm straight out of the oven.
Monday, July 8, 2013
The Heat and French Baguettes
The heat has been unbearable these last couple weeks. I feel so sorry for the horses who it seems to affect the worse. With the heat wave came an onslaught of flies. I can't even spend much time around the horses because of the amount of flies swarming them. They are relentless. I spray them down with fly spray and use a fly mask but they continue to come.
I considered a fly sheet, but really it is so dang hot out there the idea of putting on another layer no matter how thin, seems cruel.
The pasture is kept short with the exception of the weeds, but it doesn't matter.
| Sierra rocking her fly mask with ear coverage. |
The swamp across the road brings out all sorts of fly species. They certainly keep us humans indoors, hence the reason why my sudden interest in baking. As promised, I tried my hand with a french baguette yesterday.
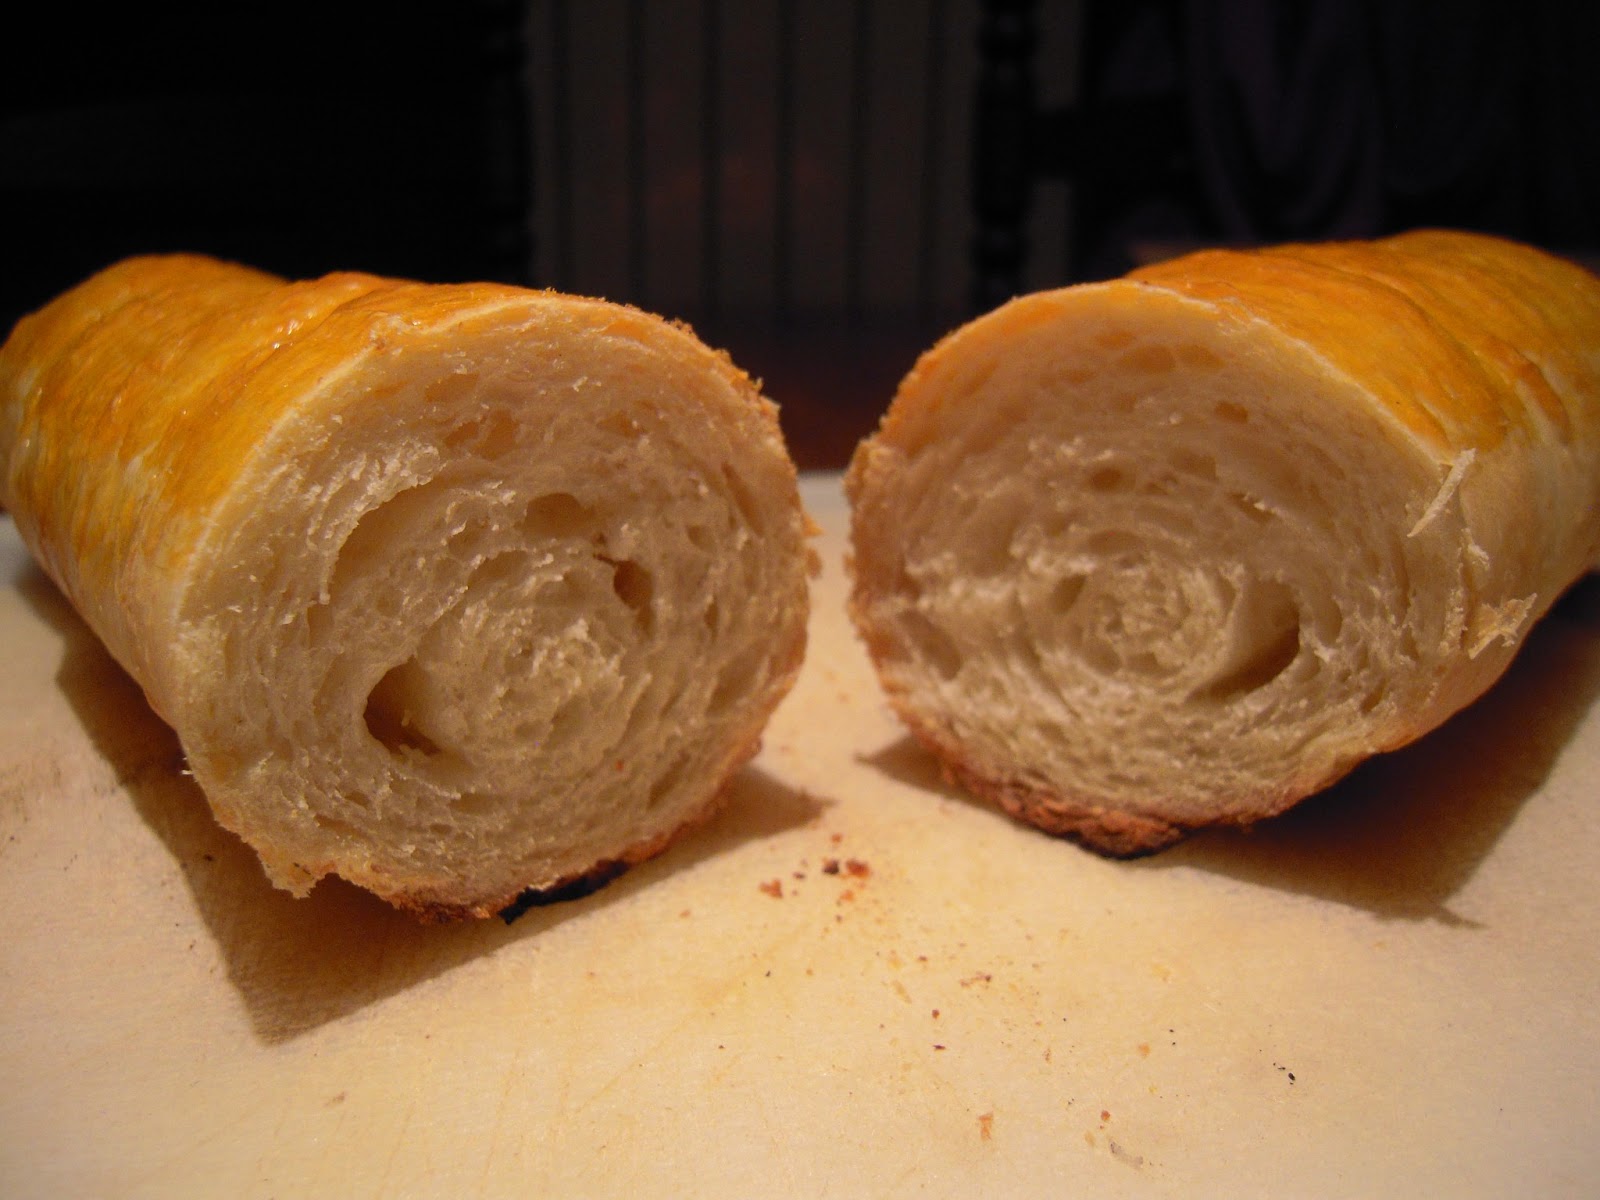
It tasted very good and was fairly easy to make. My biggest problem came with shaping the baguette. I think my dough was softer than the recipe but that only made the bread nice and airy.
However, if you don't like it so airy, then I would recommend adding another 1/2 cup of flour to the mix. My other problem was that I followed the recipe and placed the bread on parchment paper, but this caused the bread to burn on the bottom. I'm not really sure if that was the reason why it burned, but I never used parchment paper on my other loaves of bread and none of them burned. The recipe also said to set the oven at 400 degrees, but I think next time I will lower it to 350. Other than that, the bread tasted very good and I will definitely make it again. The more practice I get, the better I'll get at forming the dough I'm sure.
Here's the recipe.
2 1/2 cups of bread flour (3 cups if you want a firmer bread)
1 tbsp sugar
1 tsp salt
2 tsp yeast
1 cup warm water
1 egg
1/4 tsp water
In a medium bowl, add all dry ingredients including the yeast. Usually I proof the yeast first but this time I chose not to and it turned out fine. Add warm water until dough is ready to be kneaded. On a floured surface knead dough until smooth and elasticy (is that a word?). Place in a well oiled bowl, rolling it around until it is covered in oil. Place damp cloth over bowl and let rise for an hour. Once your hour is up, dough should have risen double it's size. Punch it to deflate. Split dough in half. With a rolling pin roll out dough until it is paper thin in a rectangle shape. On the longest edge, start rolling the dough into itself until you form one long roll. Pinch the seem shut with your fingers as well as the two ends. Roll the dough to close the seem. Take a sharp knife and score the dough in about 4 spots. My dough was so soft, that the scoring really didn't make a difference. Place the finished dough on a cookie sheet and let rise for another hour. When it is finished rising, crack an egg and separate. Add a 1/4 tsp water to yolk. Brush this mixture over your dough, place in preheated 350 degree oven and bake for 30 minutes. And that's it! Pretty easy as I said with the exception of the shaping of the dough. I need more practice with my rolling pin before I become a dough swindling wizard!
Sunday, July 7, 2013
See How My Tomato Grows...And a Delicious Angel Food Cake Recipe
My first tomato has sprouted! I'm so excited, can't wait for the other crops to start popping up.
Yesterday, I made my first angel food cake. It was divine.
Want the recipe? Here it is.
Ingredients
12 egg whites
1/2 cup cake flour
1/2 cup cornstarch
1/4 tsp salt
1 1/2 cup sugar
1 1/2 tsp cream of tartar
1 tblsp vanilla
1. Preheat oven to 325 degrees.
2. Separate egg whites.
3. In a medium bowl, mix together the flour, cornstarch, salt and 3/4 cup of the sugar.
4. In a large bowl, beat the egg whites until foamy.
5. Add the cream of tartar to the whites and continue beating until you form a soft peak.
6. Add remaining 3/4 cup of sugar and beat until forms peak.
7. Slowly pour in the flour mix.
8. Add vanilla
9. Power batter into a well greased tube pan. Tap on counter to even out and remove bubbles.
10. Cook 50-55 minutes until golden. Remove and let cool.
I usually don't post recipes on this blog because I'm not a real great chef, but lately I've been having so much fun baking and cooking that you may just see a lot more recipes here. Today I plan to make french baguettes. Will post the results and the recipe when done.
Tuesday, July 2, 2013
Proof Is In The Yeast
Have you ever heard of the term "proofing your yeast"? I hadn't. I had to look it up to determine exactly what it meant. And for those of you who never heard of it either, let me tell you. Proofing your yeast is when you test it for how active it is. Some yeast can be too old and may not be as active as it should be. I've never done this before. I didn't even know how. Some folks highly recommend you always proof your yeast. It really only takes about 5-10 minutes to do so doesn't take a lot of extra time out of your baking or a whole lot of extra work. You simply add it to a cup of warm water (about 110 degrees) and a tablespoon of sugar. The sugar is needed to make the yeast go to work. It will start to bubble and create a layer of foam on the surface of your water, that is how you know whether your yeast is active or not. If it doesn't foam, the yeast is no good and should be thrown out. Thankfully, my yeast past the test and I made a wonderful loaf of white bread.
Linking to The Prairie Homestead Barn Hop
Want the recipe? It's so simple, I love it!
Ingredients:
1 c warm water (110 degrees)
1/3 c white sugar
1 envelope of active dry yeast
3/4 tsp salt
2 tbsp vegetable oil
3 cups of bread flour
Proof your yeast in the warm water and sugar combo. When it passes the proof test, add salt and oil. Mix in the flour and knead dough. Oil a large bowl with butter, place dough in bowl and roll it around until it is covered in butter. Place a damp cloth over the bowl and let rise for about an hour. Once it has risen, punch it once, knead some more and then place in oiled bread pan. Let sit for another hour to rise. It's done rising when it is about an inch over the rim of the pan. Bake at 350 degrees for 30 minutes. Eat warm and enjoy!
Linking to The Prairie Homestead Barn Hop
Friday, February 1, 2013
My Version of Mini Pizzas
I do not profess to be a good chef....or a chef at all. As a matter of fact, I detest cooking. It is a matter of necessity rather than enjoyment for me. That said, I do get excited when I find an easy, quick and delicious meal. And will be more than happy to share here on my blog.
This one I discovered by accident. My husband loves the original of this recipe which his mother made him for years. I didn't mind them as they fell into the easy, quick and, well not bad category. I didn't love them but I could eat them. Then recently when I made them for my family, I changed up Bambino's recipe slightly because he is such a fussy eater. When we eat out and order subs, he orders lettuce and tomato sauce only on his bun. So I decided that was what I would put on his.
The original recipe is simple. Get a package of hamburger buns, lay them open separately on a cookie sheet, add a slice of processed cheddar cheese and bacon and cook until toasted. See simple.
Bambino did away with all that and got pizza sauce and lettuce only. That was when I decided to do a little something different to mine and added my favourite food, mushrooms, and switched the processed cheese to real cheese.
Here it is in a nut shell.
First fry up mushrooms and bacon in a separate pans. (Tip: frying mushrooms in butter rather than margarine or oil makes them heavenly.) You can also add onions but I'm not a huge fan.
This one I discovered by accident. My husband loves the original of this recipe which his mother made him for years. I didn't mind them as they fell into the easy, quick and, well not bad category. I didn't love them but I could eat them. Then recently when I made them for my family, I changed up Bambino's recipe slightly because he is such a fussy eater. When we eat out and order subs, he orders lettuce and tomato sauce only on his bun. So I decided that was what I would put on his.
The original recipe is simple. Get a package of hamburger buns, lay them open separately on a cookie sheet, add a slice of processed cheddar cheese and bacon and cook until toasted. See simple.
Bambino did away with all that and got pizza sauce and lettuce only. That was when I decided to do a little something different to mine and added my favourite food, mushrooms, and switched the processed cheese to real cheese.
Here it is in a nut shell.
First fry up mushrooms and bacon in a separate pans. (Tip: frying mushrooms in butter rather than margarine or oil makes them heavenly.) You can also add onions but I'm not a huge fan.
Once done, lay them over your upturned buns on a cookie sheet.
Garnish with cheese.
Now this last step is really what made the difference between my version and my MIL's version. As I mentioned earlier, she used processed sliced cheese. Normally, I enjoy processed cheese. Actually it is the only cheese I've ate my entire life because you see I hate cheese. But either we were out of processed cheese or I was in the mood to try something different, I don't recall. And why I chose this cheese, is even more mind-boggling as the smell of cheese is disgusting to my senses but this one takes the cake. I nearly threw the bag out it stunk so bad. This is the bag, the flavour is call Luncheon.
And I can promise you it tastes nothing like it smells once cooked. Nor smell. Thank goodness. Once you have added the cheese, place in oven at 400F until toasty. Eat alone for lunch or add side dishes with it for supper. Absolutely delicious. I crave them all the time.
Subscribe to:
Posts (Atom)